Search Lvl. 100 Crafts

Friday, December 15, 2017

Let it Snow

Russian Tea Cakes


Also called snowball cookies, this recipe has been in my family for several generations and has always been a part of my Christmas cookie baking.  These cookies also happen to be my husband’s favorite.  They are quick and easy to make.  I hope you enjoy them as much as we do.


Ingredients:

  • 1 cup butter, softened
  • ½ cup confectioner’s sugar
  • 1 tsp vanilla extract
  • 2 ¼ cup flour
  • ¼ tsp salt
  • ¾ cup walnuts, finely chopped
  • Confectioner’s sugar (for rolling after baking)


Directions:

  • In a large mixing bowl, thoroughly combine butter, confectioner’s sugar, and vanilla.  Set aside.
  • In a medium mixing bowl, combine the flour and salt.
  • Slowly add the dry ingredients to the butter mixture and stir until combined.
  • Stir in the nuts
  • Cover and chill dough for at least 1 hour
  • Preheat oven to 400 F
  • Roll dough into 1” balls and place about 1” apart on ungreased baking sheet.
  • Bake 8-9 minutes (they will not rise)
  • While still warm, roll in confectioner’s sugar. Let cool
  • Roll in confectioner’s sugar again
Wednesday, December 13, 2017

Holly Jolly Christmas

No Baking Necessary


Every year, I do quite a bit of Christmas cookie baking (though not all of it is baked and I don’t only make cookies). Since I managed to pull my hamstring, baking has been out of the question due to not being able to bend down and put things in the oven. Fortunately, two of my favorite recipes don’t use the oven at all, and they are quick to make. I made both recipes in under 45 minutes. Though these recipes are simple, they do require attention throughout the process, so be sure to read through the entire recipe before starting.

I’ll start off with my fudge recipe. This is the only way I have ever made fudge, and my mom has made fudge this way for as long as I can remember. It’s only 2 ingredients, and easy to augment with other flavors. When making this fudge, be sure that everything you use is perfectly dry. Any amount of water will ruin it.

2 Ingredient Fudge

Yields: about 30 1” pieces

Ingredients:

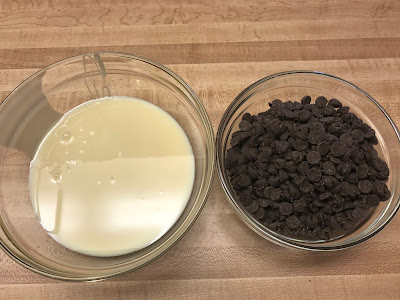
  • 1 bag (12 oz) of semi-sweet chocolate morsels 
  • 1 can (14 oz) sweetened condensed milk

Directions:

  • Line a 9 X 9 inch pan with a piece of parchment paper
  • Combine ingredients in a small saucepan
  • Heat over medium heat, stirring constantly until smooth
  • Once smooth, immediately remove from heat and pour into prepared pan lined with parchment paper
  • Cool in refrigerator and allow to set overnight
  • Cut into pieces and enjoy
Note: This fudge is very rich, and usually a 1” piece is enough for your average sweet tooth.


Variations:

  • Add in about ½ cup of peanut butter for chocolate peanut butter fudge
  • Use peanut butter morsels instead of semi-sweet chocolate for peanut butter fudge
  • Use chocolate mint morsels for a minty fudge
  • You can use just about any sort of flavoring, but be sure it’s not water-based as that will ruin the fudge
My next recipe is a family favorite: no bake oatmeal cookies. As the name suggests, there is absolutely no baking involved.

No Bake Oatmeal Cookies

Yield: about 4 dozen cookies, depending on the size

Ingredients:

  • ½ cup butter
  • 2 cups granulated sugar
  • ½ cup milk
  • 4 Tbsp unsweetened cocoa powder
  • ½ cup peanut butter, smooth
  • 2 tsp vanilla extract
  • 3 ½ cups dry oats

Directions:

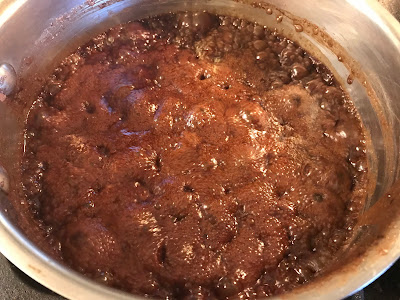
  • In a medium saucepan, combine butter, sugar, milk, and cocoa powder. Bring to a rolling boil
  • Boil 1 minute and remove from heat
  • Add peanut butter and stir until melted
  • Add vanilla and oats. Mix well
  • Drop by the teaspoon onto parchment paper
  • Let cool until set, usually 30-45 minutes

Friday, December 1, 2017

Candy Cane Christmas

Peppermint Bark


I love peppermint, and I love easy-to-make snacks.  Peppermint bark falls into both of those categories.  It also makes a perfect topper for my (soon-to-be-available) peppermint hot chocolate cupcakes.  This snack is also great with vanilla ice cream or just by itself.
Note: When making this, make sure that everything you use is very, very dry.  Water will ruin the melted bark.


Ingredients:

  • 12 oz almond bark
  • 1 - 1 ½ cups peppermint candies


Directions:


  • Place the candies in a ziplock bag, and using a rolling pin or meat mallet (or other heavy item) crush candies.
  • Line a cookie sheet or baking pan with a piece of parchment paper.
  • Place almond bark in a medium microwave-safe bowl.  Be sure the bowl is dry.
  • Melt almond bark in microwave 1 minute at a time on medium power.  Stir well in between.

  • Pour crushed candies into melted bark and mix well.

  • Pour the candy and melted bark into the pan lined the parchment paper and spread evenly.

  • Allow to set for several hours.
  • Once set, break into small pieces.

  • Enjoy.

Wednesday, November 29, 2017

Deck the Halls

Christmas Decorating

As I talked about in my last post, I love Christmas.  Last week, I spent 3 days helping my mother decorate her home for Christmas.  This week, I’ve been doing the same for my place (it has taken considerably less time, though).  I truly enjoy the decorating process (much to the bewilderment of my friends), and I add just a little bit every year, if I can.

My tree is full of decorations that I have collected for as long as I can remember.  I love decorating my tree because as I pull out the ornaments, I am able to reminisce about where I got the ornament.  My ornaments are a combination of gifts, mementos from trips, and ornaments I have made.  It’s a very eclectic tree, but it makes me smile whenever I look at it.

One of my favorite holiday decorations is gingerbread and gingerbread-related items.  My love for gingerbread started about the time I began doing my annual gingerbread baking (recipe to come later).  It has become a popular theme for many of the gifts from my family.  So popular, that I now have a small village and enough to deck out my bathroom with gingerbread.

Several years ago, my mother decided that she needed to wrap her pictures to look like presents, and I followed suit starting last year.  I also added ribbon to my kitchen cabinets.

It’s such a comforting and wonderful place for me, as I sit in my home surrounded by Christmas.

Monday, November 27, 2017

Christmastime is Here

Christmas


It’s finally the Christmas season, and that makes me so happy.  This is my favorite time of year.  The traditions, the decorations, the joy, the anticipation, and (of course) the treats all combine to make this season the happiest for me.  I don’t care about the gifts that I receive as much as I care about the gifts I give.  This is a time of year that I get to do something for others.  I give gifts to my friends and family that make them smile and bring them joy.  I take treats to the library staff, and their eye light up to see the gingerbread and fudge that I’ve made for them.  There are Christmas parties with silly games and lots of laughter and joy.  I want these feelings to be present all year round.
I know a lot of people feel stressed over the holidays with all the cooking, shopping, and expectations.  I think we should all take a step back and remember the joy we felt as a child on Christmas.  Yes, there are a lot of expectation, but how much of that do we put on ourselves?  What if we all decided to do the things that bring us and others the most joy?  Does that mean changing up how you decorate?  Does it mean more baking? Less baking? Doing more events and fewer gifts?  Maybe your Christmas dinner is different?  That’s okay.  Christmas shouldn’t be a stressful time of year.  Consider looking at what part of the Christmas season may stress you and finding a way to change it so that it brings you joy.  Maybe you don’t want to make 20 pies for Christmas.  That’s okay.  Pick your favorite and make that one.  It’s okay to step back from all the expectations out there and find a way to enjoy the Christmas season.
Personally, I enjoy decorating my house so that it looks like the set of a Hallmark Christmas movie (I get this from my mom).  I love to bake Christmas cookies and take them to people so they can enjoy them.  I buy gifts for all of my family and friends.  I love to wrap gifts and partake in my family’s traditions.  I listen to Christmas music and watch Christmas movies.  These are the things that make me happy at Christmas.  This year, I will be doing more Christmas crafts than ever before, and I will be sharing them here for you.  I will also be sharing my Christmas cookie recipes with you and some of my favorite traditions.

I truly hope that you can find joy this Christmas season, just as I do with my family.

Friday, November 17, 2017

Apple Pie Recipe

Apple Pie


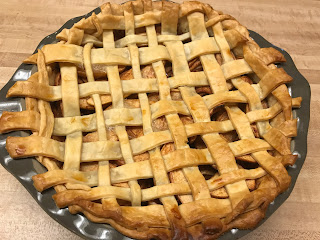
My favorite pie is apple pie, and my dad and I make this every year for Thanksgiving and Christmas.  We used to make the pie crusts from scratch (and by we I mean my dad would make the crust and I would help lattice and eat the extras).  I cheat and use store bought crusts because for some reason I haven’t mastered pie crusts yet (one of these days I will).  This is the recipe I like best.  It uses brown sugar instead of granulated sugar, and I love the flavor of it.  I hope you enjoy as well.


Yields: 1 9” apple pie


Ingredients:


  • 2 pie crusts
  • 6-7 cups of apples, sliced
  • ¾ cup brown sugar, packed
  • 1 Tbsp cinnamon, ground
  • 1 Tbsp butter
  • 1 tsp lemon juice


Directions:


  • Preheat oven to 425 F
  • Lay one pie crust in a 9” pie pan.  Poke holes with a fork to prevent air bubbles.
  • In a large bowl, combine apples, lemon juice, brown sugar, and cinnamon.  Mix well.

  • Pour apple mixture into pie pan.  Dot with butter.
  • Top with second pie crust (I lattice mine)

  • (Optional) Brush top crust with an egg wash (egg white mixed with 1 Tbsp of water)
  • Shield pie with aluminum foil
  • Bake for 50-60 minutes, until apples are cooked.

Wednesday, November 15, 2017

How To Lattice a Pie Crust

Pie Latticing

How to lattice a pie

I love to bake pies, especially apple pie.  Since apple pie is a 2 crust pie, I also like to get a little fancy with it.  My favorite way to do the top crust of a 2 crust pie is to lattice it.  It looks like it would be complicated, but it’s really not that bad. There are multiple approaches to this, and I’ve outlined below the method I usually use with descriptions and pictures If you follow along, you’ll be latticing your own pies in no time.  Happy pie season!

Materials Needed:


  • Pie crust (from scratch or store bought is fine)
  • Pizza cutter (can use sharp cutting knife)
  • Sharp cutting knife

Directions:


  • Lay out your pie crust in a circle the same diameter as your pie pan

  • Using the pizza cutter, cut relatively even strips about ¼” - ½” in width along the entire length of your crust. (Since it’s a circle it doesn’t matter which direction you cut it)

  • Pick up every other strip and lay across the top of the already filled pie as evenly as you can

  • One at a time, use the remaining strips to lattice:
    • Start at one end and lift the end of every other strip on the pie

    • Lay your new strip so that it goes across all the remaining strips on the pie

    • Lay down the previously lifted strip ends

    • Lift the strips that you did not lift last time; these are the strips lying under the last strip you just laid down (lift from the inside of the previously laid strip)

    • Lay your next strip so that it goes across all the remaining strips on the pie

    • Lay down the previously lifted strip ends

    • Continue in this pattern as evenly as you can until all the strips are used

  • Using your sharp cutting knife, carefully cut any pieces of crust that fall over the edge of the pie pan

  • Brush with an egg wash (optional, though this does give it a nice golden-brown finish)
    • To make an egg wash, mix 1 egg yolk with 1 Tbsp of water
    • Brush over the pie crust using a pastry brush

Monday, November 13, 2017

Fall Scarf

Fall Zigzag Scarf


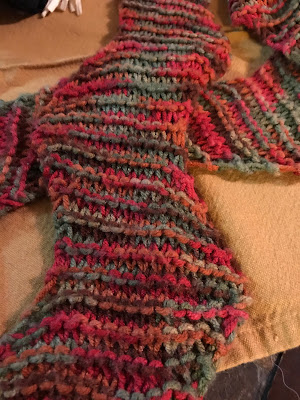
I made this scarf several years ago, and I still love the look of it.  I made this with an ombre yarn in fall colors, but you can use whatever yarn you like.  I went back and tried to find the original pattern, which was online, but it is no longer available.  I do remember the pattern pretty well and will try to recreate it here for you.  I hope you all enjoy this pattern.  Let me know if you decide to make this for yourself.


Materials:


Yarn (I used less than one skein of I Love This Yarn in an autumn ombre color)
Size 10 knitting needles (gauge isn’t really important, and I purposely chose larger than necessary needles for loose stitches
Yarn needle for weaving in yarn ends


Directions:


  • Cast on 40 stitches
  • Row 1-5 knit across
  • Begin zigzag pattern
    • Row 1:  Kfb, knit across to last stitch, K2tog
    • Row 2: Knit across
    • Repeat Rows 1 and 2 for a total of 13 rows ending with row 1 of the pattern
  • Repeat zigzag pattern until you reach desired length. (I made mine 6 feet long)
    • Note: you will be working Row 1 of the pattern back to back; this is what switches the zigzag direction
  • Knit 5 rows
  • Bind off loosely
  • Weave in yarn ends