Search Lvl. 100 Crafts

Friday, September 29, 2017

Caramel White Chocolate Chip Cookies

Caramel White Chocolate Chip Cookies


I came up with this recipe quite by accident.  I was actually trying to replicate another recipe: a caramel chocolate chip with nuts.  I went to make the recipe and realized I didn’t have nuts, and I only had white chocolate chips instead of semi-sweet chocolate chips.  So I decided to experiment, and it turned out great.  These are now my go-to cookies.


For this recipe, I melt my own caramel sauce, but you can use prepared caramel sauce if you like.  Below the cookie recipe, I will add in my recipe for my caramel sauce.


Ingredients:
1 cup butter-flavored shortening or butter, softened
¾ cup granulated sugar
¾ cup brown sugar, packed
2 tsp vanilla extract
2 eggs
2 ¼ cups all-purpose flour
1 tsp baking soda
1 tsp salt
¼ cup caramel sauce
2 cups white chocolate chips


Directions:


  • Preheat oven to 375 F
  • In a large bowl, cream together butter and sugars until well combined and creamy
  • Add in vanilla extract.  Mix well
  • Add eggs one at a time, beating well after each egg
  • In a separate bowl, combine the dry ingredients
  • Slowly add the dry ingredients to the wet ingredients about a cup at a time, mixing well after each addition.
  • Add in the caramel sauce, mixing well.
  • Fold in the chocolate chips


  • Drop dough by the spoonful on ungreased cookie sheets


  • Bake in preheated oven for 9-11 minutes until golden brown.
  • Cool cookies on wire rack


Caramel Sauce


Ingredients:
1 cup caramel candies
4 Tbsp heavy cream (to desired consistency)
1/2 tsp salt (optional, for salted caramel sauce)


Directions:
  • Combine ingredients in a microwave safe bowl
  • Microwave on half power for 30 seconds at a time stirring well each time

Wednesday, September 27, 2017

Washi Tape Bookmarks

Washi Tape Bookmarks


I am an avid reader and have a small (actually not small) collection of bookmarks from over the years.  I recently purchased some Halloween Washi tapes because they were just so cute.  Then I needed to find a project for them.  Of course, I went to Pinterest and found some very fun-looking projects.  One of those projects was DIY bookmarks.  This is my take on that project.  These are simple and fun bookmarks to make, and they are so easy to customize.


Materials:


Thin cardboard or posterboard
Washi Tape
Scissors
Hole Punch
Ribbon


Directions:

  • Cut the cardboard or posterboard so you have a 6” X 1 ½” rectangle, or your desired size
  • Using strips of Washi tape, begin covering the bookmark in stripes of the tape


  • Use the hole punch to punch a hole at the top


  • Cut ribbon to about 3” (or desired length)
  • Fold ribbon in half and thread free ends through the hole, but not pulling through the folded end


  • Going over the top of the bookmark, thread the free ends of the ribbon through the loop and pull tight.


Monday, September 25, 2017

Personalized Clipboards

Personalized Clipboards


When fall comes around, I start pulling out all of my Halloween and fall items. Everything gets transitioned to the new season, and that includes my crafting.  I recently learned how to make these personalized clipboard  at a church event, and I absolutely love them.  I feel I need to share these with all of you.  For these, you can personalize them with whatever colors and and textures you enjoy.  


I have recently started making some for Halloween, which are available for sale in my Etsy store.  For those of you inclined to make these for yourself, here is an easy-to-follow guide.  Enjoy, and feel free to share your finished products with me.  I can’t wait to see them.


Materials:


  • Plain clipboard
  • Decorative paper - 2 types
  • Scissors
  • Mod Podge
  • Sponge brush
  • Ribbon


Directions:

  • Cut your primary paper to fit your clipboard.  The clipboard shown is a 6” X 9”, and I cut the paper to be 6” X 8 ½”.  You can cut it shorter if you like and round the corners for a closer fit.
  • Cut your secondary paper in a strip.  I cut mine to be 6” X 2”


  • Apply a thin coat of Mod Podge to back of the clipboard.


  • Position your primary paper ( the larger piece) on the clipboard over the Mod Podge.  Press down firmly pushing out air bubbles.


  • Apply a thin coat of Mod Podge over the paper where you would like to place your secondary piece of paper.
  • Position your secondary paper (the smaller piece) where you would like it, and press down firmly pushing out air bubbles.


  • Apply one last thin coat of Mod Podge over both papers covering them entirely.


  • Allow to dry.
  • Tie ribbons around the loop at the top.  When cutting your ribbon, but at a slant to decrease the chances of unraveling.


Friday, September 22, 2017

Chocolate Lavender Bread

Chocolate Lavender Bread


Since I made the blueberry lavender jam, I have been wanting to do more baking and cooking with lavender.  Fortunately, my mother is helping me in this endeavor (though she didn’t realize it at the time).  My mom found a recipe in Southern Living magazine for a very yummy-looking chocolate bread with lavender glaze.  Of course, we made it our own (mostly to add lavender).  It was so delicious.  I hope you try it and let me know what your thoughts are.


Bread Ingredients:


1 ½ cups all-purpose flour
1 tsp baking powder
¼ tsp salt
1 ¼ cups granulated sugar
½ cup butter, melted
2 eggs
3 Tbsp milk
1 oz semi-sweet baking chocolate, melted and cooled
¼ c semisweet mini chocolate chips


Lavender Glaze Ingredients:


½ cup powdered sugar
2 Tbsp milk
½ tsp culinary lavender


Directions:

Bread
  • Preheat oven to 350 F.  Coat an 8 ½ X 4 ½ inch loaf pan with cooking spray or butter
  • In a medium bowl, combine the flour, baking powder, and salt.  Set aside
  • In a large bowl, beat the sugar and melted butter until well combined.  
  • Mix in the eggs.
  • Stir in the milk.
  • Stir in the cooled, melted chocolate until the batter is a consistent milk chocolate color with no more streaks.
  • Gradually fold in the dry ingredients until everything is just combined. Do not overmix.
  • Fold in the chocolate chips.
  • Pour the batter into the prepared pan.  Baked for 50 to 55 minutes, until a toothpick inserted in the center comes out clean.
  • Let bread cool for 15 minutes in pan.  Remove loaf from pan allow to cool completely, about 1 hour.


Glaze

  • In a medium bowl, add the milk to the powdered sugar 1 Tbsp at a time until it is a thick but pourable glaze.
  • Crush the lavender with your fingers and add them to the glaze.
  • Combine well.
  • Pour the glaze over the bread, and let it sit for about 15 minutes before slicing

Wednesday, September 20, 2017

DIY Fancy Bow

Bow Tutorial


You know those fancy bows seen on wreaths, doors, windows, and packages?  They look intimidating, but in reality are so easy to make.  I make these for nearly every wreath I do and for various other decorations (especially during fall and the Christmas season).  I recently taught a friend of mine how to make these bows.  This friend is not a crafter, and her bow turned out lovely.  She was amazed at how simple this was to make.


Materials:


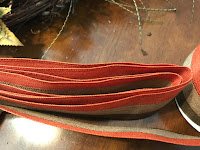
  • Wire-rimmed ribbon
  • Scissors (not shown)
  • Wire (florist’s wire works well, but I’ve done this with twist ties from bread bags before)
  • Wire cutters


Directions:

  • Measure how wide you would like your bow to be, and stretch out your ribbon to this length.  Do not cut yet.
  • Fold your ribbon back on itself.  This will give you one loop on 1 side and 2 ends on the other.
  • Fold your ribbon again so that you have 1 loop on each side and 1 end on each side.
  • Continue folding your ribbon until you have 4 loops on each side and 1 end on each side.


  • Cut your ribbon with just a little extra length.
  • Keeping your  ribbon looped, find the center and wrap your wire around it.


  • Tighten and twist (like a twist tie on a bread bag).  The twist will be at the back of the bow.  Leave some wire so you can use it to attach the bow to a wreath, if desired.


  • Working with the front of the bow facing you, gently pull both ends down and towards the center of the bow.
  • Slightly separate the loops on both ends and shape to desired roundness.


  • For a finished look, fold the very ends of the ribbon in half length-wise for a little ways. Then cut on a diagonal.


  • Using the extra length of wire, you can wrap the wire around the wreath and twist to tighten in place.