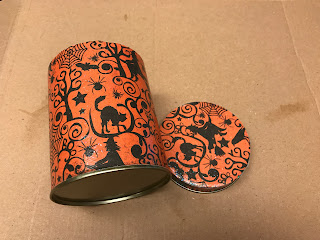
Halloween Tins
My mom was thinning out her Halloween decorations, and I was happy to add to my collection. Among these decorations was a set of three Halloween tins that were pretty dated. Since I have been doing a lot of crafting with Mod Podge I thought it would be fun to upgrade these old tins. I loved this project and will probably now find others to update. Let me know if you make these. I can’t wait to see what you all come up with.
Materials:
Old tin
Decorative paper
Pencil
Scissors
Mod Podge
Brush (I prefer sponge brushes)
Washi tape (Optional)
Directions:
- Measure the tin height and circumference using the measuring tape.
- Cut your decorative paper to the measurements. (Mine was 4 ½” X 11”)
- Using the pencil trace the outline of the tin’s lid on the back of the decorative paper and cut out the circle.
- Measure the height of the lid, and cut a strip of paper using the height of the lid and the circumference (Mine was ½” X 11”)
- Using the brush, apply a thin layer of Mod Podge to the tin.
- Carefully, place the largest of the paper pieces to the tin over the Mod Podge, smoothing as it goes around.
- Using the brush, apply another thin layer of Mod Podge to the top of tin’s lid.
- Place the circular piece of paper on the top of the tin’s lid, and smooth
- Using the brush, apply yet another thin layer of Mod Podge to the side of tin’s lid.
- Carefully, place the last piece of paper around the edge of the lid smoothing as you place it around the edge.
- Allow these to set for a time.
- If you choose, you can put the Washi tape over the thin strip on the edge of the tin’s lid.
- Using the brush, apply a thin coat of Mod Podge (I used the sparkly formula) over the tin and the lid.
- Allow to dry.


No comments:
Post a Comment